Software packages for Planetary Astrophotography
By Michael A. Phillips
January 17, 2016
Updated December 5, 2023
TL;DR
Introduction
This article is an overview of techniques, methodology and software steps I use for planetary astrophotography. In future articles I will delve deeper into each area and expand details of different types of hardware options, software choices, settings and styles of processing. I will explain what each step does, why it is important, highlight alternatives and discuss the file input and output.
Basic, Must Master Tutorials
I will assume that the reader already has optics and cameras that you want to use better for Planetary AP. Before discussing the software tools that I use, it is important to talk about the most understated aspects of using a telescope. They are covered here.
You really need a firm understanding of the fundamental aspects of your telescope and your weather conditions.
Brief discussion of hardware options
While not the subject of this article, a brief discussion of my hardware will help understand some of the basics of my software choices.
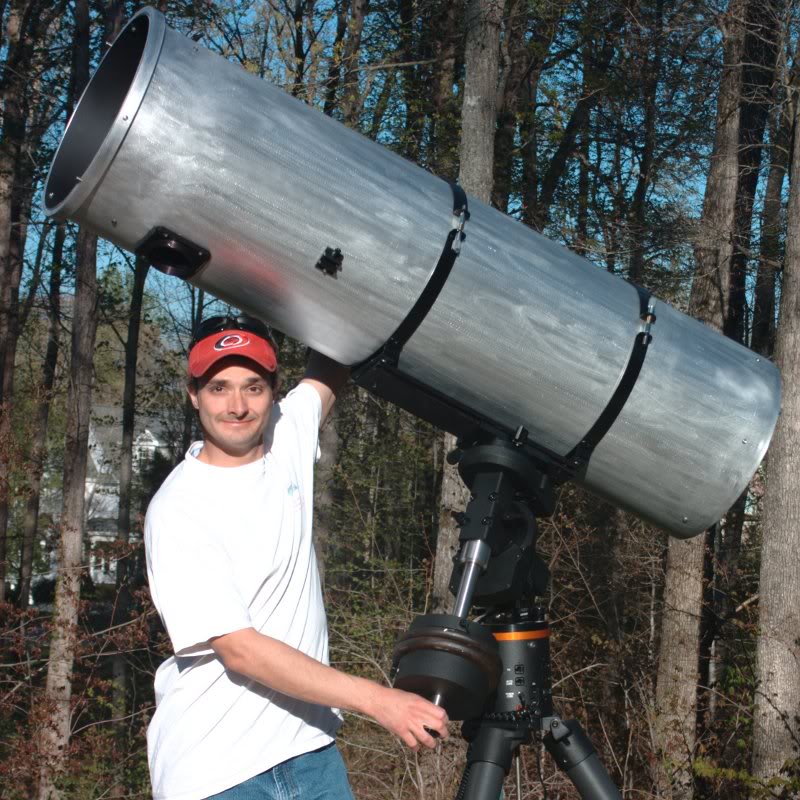
My current telescope is a homebuilt 14” f/4.5 Newtonian seen here
Along with this nearly immobile setup I also use a FLIR Blackfly BFS-U3-32S4M-C monochrome camera. There is a full list in the appendix at the end of this article.
Software Packages
Whatever telescope and camera you may have, there are many choices that you can have to capture images or video and turn them into your final photos.
Capture
Capture simply means to move image data from your camera to your computer or other storage device. One of the most important steps, there are some differences in the cameras that will give different results and also use different methods.
Capturing images for planetary astrophotography is quite different than other types of photography. The end goal of high resolution images is more easily obtained by using a method of stacking called, “Shift-and-add” or “Image-Stacking” (https://en.wikipedia.org/wiki/Shift-and-add). The end goal in
this method is to “obtain high quality images from a number of short exposures with varying image shifts” This means that during the capture process we will attempt to gather as MANY frames as we possibly can. In this way the highest quality frames can be used and the poor ones can be thrown away. This process is gated mostly by your camera and secondly by your computer.
The capture software you use will be determined in large part by the type of camera you use. Very often your camera vendor will include software and drivers with your purchase. Most pre-packaged software is fairly rudimentary.
Whether you are using a flexible webcam, DSLR or purpose built astronomy camera, things to l
ook for in your capture software are support for peripheral control like – focuser, filter wheel and even control the mount.
Reasons to consider a fully automated package for planetary AP might not seem obvious at first. For fast rotating planets like Jupiter, you are quite time bound for how long you can take photos for before the rotation of the planet itself causes a ‘smearing’ effect. Having to manually change filters, or recenter the planet in your camera’s field of view all cause you to ‘lose’ imaging time.
As a dedicated planetary camera user, for my purposes, i use FireCapture..
Written by Torsten Edelmann, this capture software runs in Windows and supports an amazing array of cameras, color filter wheels, focusers and telescope mounts for auto-centering without the need for a separate guide camera. What's more, FireCapture automates filter changes, focus adjustments and camera settings per channel for the discerning mono-imager like myself!
I typically record a sequence of Red, Blue, then Green and often Infra-Red filtered video files in 8bit, AVI format. The reason for this is that if something goes wrong, clouds, equipment, full disk etc, I can create a Synth Green with 50%/50% Red/Blue! These files are then used in the process of Lucky Imaging (https://en.wikipedia.org/wiki/Lucky_imaging).
Here is an example of a Red Channel on Mars:
...and the blue
Lucky Imaging and Image-Stacking
Lucky Imaging
The term “Lucky Imaging” is simply a means to to get around the poor effects of taking photos through an unstable atmosphere. This software step takes all the frames you recorded in the ‘Capture’ step and sorts them by the overall quality. There are various options of how to do this including single point and multipoint align. The best images are then stacked or averaged. This process of sorting and averaging helps produce an overall much finer image than a single frame would.
The biggest choices here are RegiStax and AutoStakkert! Both are freeware licensed and excellent choices. Results from both packages are fantastic, but this imager feels that AutoStakkert! is the choice software to use to sort and stack! Written by Emil Kraaikamp this software will make the most of your captures.
Emil is a great astrophotographer in his own right. Because of his discerning eye he has written a great aligning and stacking program .
“AutoStakkert! 2 is all about alignment and stacking of image sequences, minimizing the influence of atmospheric distortions (seeing). Its goal is to create high quality images of the Planets, the Sun, and the Moon, without too much hassle” - Emil
Supporting a variety of camera file formats from video to still images, you will find that this package will make the most of your captured data and turn them into a fine result.
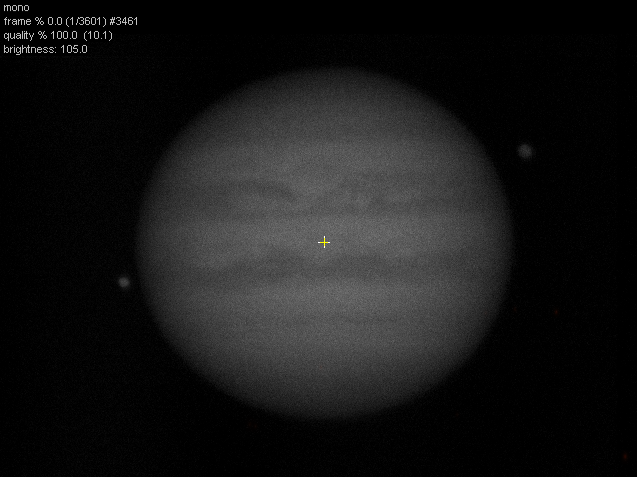
According to AS!2 this is the best frame of a single 30sec run on Jupiter
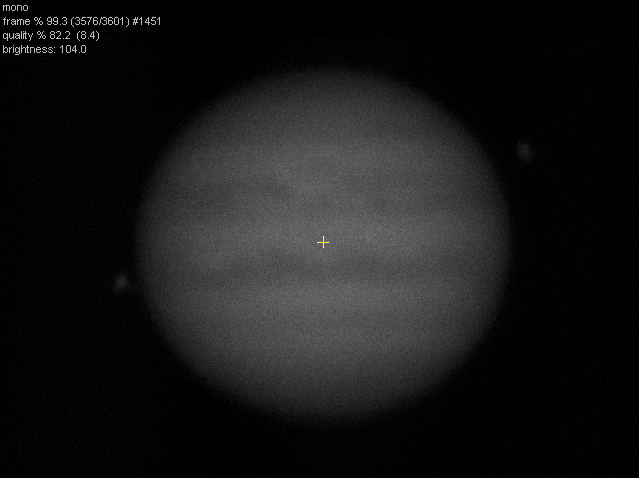
… and this is the worst frame…
Now you get a good idea of why we use Lucky Imaging. Finding all those good ones and getting rid of the bad make a huge overall improvement of your final image.
AS!2, takes my 8bit, AVI files in and saves them as a .TIFF image file. These file are then able to produce a color image by combining them from mono into RGB, or if you have a one shot color camera, you have, at this step a somewhat good looking final image.
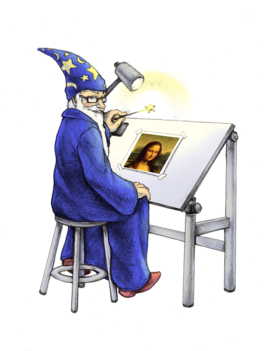
Sharpening
After implementing a fast-frame rate capture routine to perform the Shift-and-add stacking technique, we end up with a resultant .TIFF file from AutoStakkert that produces a fairly pleasing image. Typically you will want to use an additional software package that brings more details out. Image sharpening is a powerful tool for emphasizing texture and drawing viewer focus. There are a few methods to perform sharpening and I use different methods at different steps. Popular techniques are wavelets and deconvolution. The algorithms are different but the results can be quite similar.
Before discussing different software packages I cannot stress enough having a written, trial and error, side by side comparison system for your workflow. I suggest you use this if only to keep yourself on track to avoid oversharpening, which is a trap that is all too easy to fall into. Each night’s conditions and your scope’s performance can vary and having a few settings to go back to and refine overtime will greatly improve your overall experiences and end results.
The major sharpening techniques are deconvolution, unsharp masking, high pass filtering and wavelets. Which one to use depends on personal choice to some degree. Popular ones are wavelets and deconvolution. The author uses deconvolution, specifically Lucy-Richardson deconvolution in my choice package is AstraImage. Previously I used RegiStax and Iris. While each software package has it’s own strengths, I ended up using AstraImage because of it’s ease of use and flexibility.
This step will consume a large portion of your time. I cannot stress enough using a split screen comparison. By that I mean have a reference of your own or another user’s or professionals on one half of the screen as well as your sharpening program. It is a very useful trick that help guide you to sharpen the right amount. If you sharpen too much you’re going to distort or distort your data. If you don’t sharpen enough you will ‘leave data on the table’. Having a stare and compare will really help you find the sweet spot.
Never ever be satisfied with your results and you may find that as you get seasoned in imaging your tastes for how sharp you like you your final images.
Historically I used to use AstraImage to combine my images into color, RGB versions. Now I script this in native Linux or WSL with ImageMagik and python scripts.
RGB assembly and animation creations
With a major focus on automation I tapped into ImageMagick
® is a free,
open-source
software suite, used for editing and manipulating digital images. It
can be used to create, edit, compose, or convert bitmap images, and
supports a wide range of file
formats, including JPEG, PNG, GIF, TIFF, and PDF.
A simple command that can be easily repeated in Python is:
RGB assembly =
convert RED.tif GREEN.tif BLUE.tif -combine -set colorspace sRGB RGB.tiff
Animation =
convert -delay 10 *.tif animation.gif
Derotation
So far we have acquired images, taken the best ones and stacked them into a smooth looking image. We then applied
WinJUPOS is a very powerful software tool that performs a variety of functions. This step is completely optional but really helps in a variety of areas.
WinJUPOS - derotation of planetary in Linux under wine
For our purposes WinJUPOS will help us overcome limitations of the effect of planet smearing. For fast rotating objects like Jupiter or the gas giants you can only image for so long before the features move and it smears. Much like a runner in a long exposure you will see a smearing action in the planet’s features. If exposed too long you will notice a degrading of details in the detail. Why expose longer you ask, simple it helps get more frames that will help counteract any noise or poor frames due to seeing.
I use WinJUPOS to take many short RGB images into a longer set that has the effect of stacking in that it will smooth out any more noise and also correct for any over sharpening on the limbs.
Post Processing and Denoise
Topaz Labs DeNoise - Photoshop or GIMP plugin
Image modification / Post Processing
At this stage, you should have a pretty good looking image, but in Photoshop or Gimp we can clean up and enhance a few more things.
Depending upon where you used WinJUPOS' derotation or not or depending upon how many derotated images you used will determine how much denoise you use. Typically if I have at least 5x90s dertation I can use a small amount of Topaz's "Overall Strength" at around 0.03 or so.
If I use higher gain or less images I may go as high as 0.06. If I use Ir or really high gain, I may have to go higher than 0.12 but it really comes down to the source image quality. Keep in mind that We will sharpen again after this step.
I use photoshop for the following things: Color adjustment, Topaz DeNoise, Saturation, High Pass filtering and Contrast.
In upcoming articles, I will discuss these ideas in greater detail.
GIMP - native Linux used for final assembly with info and labels or quick 8-bit processing
Also be sure to add some of these cool GIMP Plugins:
In upcoming tutorials I will describe how I use these filters to enhance my planetary images even more.
How Mike Got Started
Appendix
Mike’s Full Equipment
Akule Planetary
Equipment H/W
* Type: Custom Home
Built Newtonian (https://astromikephillips.wixsite.com/home/mikesastronomyequipment)
* Aperture: 35.6cm
(14")
* Focal Ratio: f/4.5
+ 5x TeleVue Powermate at 0.078"/px | 9,109mm EFL
* Primary Mirror:
Carl Zambuto 14" f/4.5
* Camera: FLIR
Blackfly BFS-U3-32S4M-C (monochrome, USB3.0)
* Color Filter
Wheel: Starlight Xpress 7 Position 1.25" Carousel for Starlight Xpress USB
Filter Wheel
* Filters: Baader
Planetarium LRGB Telescope Filter Set
* Filters:
Astronomik ProPlanet 742 IR-pass filter
* Filters:
Astrodon-Schuler UV filter
Images: http://imgur.com/a/0znBY#0
Blog: http://maphilli14.webs.com/apps/blog/?view_type=1
_______________________________
**Akule Planetary
Processing S/W**
* OS: Lenovo P1 Gen
2 (Microsoft Windows 11 64-bit)
* Acquisition:
Torsten Edelmann’s Firecapture
* Processing:
AutoStakkert 3 -> AstraImage -> WinJUPOS -> PhotoShop -> Topaz
DeNoise -> Google Nik -> Gimp - https://imgur.com/a/RhPRXD2
Detailed processing
- https://astromaphilli14.blogspot.com/2020/09/mars-2020-processing-recipie-25x-pm.html


No comments:
Post a Comment
You are no longer able to spam this blog
Note: Only a member of this blog may post a comment.